Whokay, so I'm back from a like year long hiatus :)
I got promoted at my work last December and sense then I have had little time to blog BUT part of a new year resolution is to make time to blog. I have several projects I did last year that I have wanted to post but never got around to it.
So to start the year off, I wanted to post a cool project I did for my uncle's wedding gift. Okay so don't laugh at me but now that I think of this I actually did this project in October of 2010. Wow so the time sure flies by pretty quick!
My uncle was married on October 10th, 2010. On their invitation they had this cute little 10.X.10 thing so I really wanted to add it to the gift.
Supplies needed:
Supplies needed:
Door mat-Walmart like 10 bucks
Black paint
Stencil brush
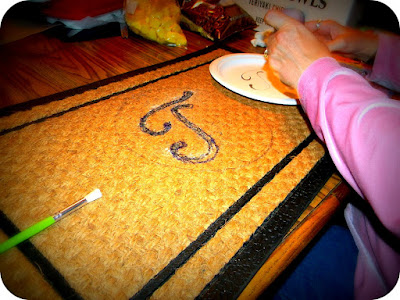
I searched Word for the perfect font for the T and this curvy one is what we liked best! My mom is really good at drawing and I knew I would totally screw it up so I had her draw the T onto the mat so I could fill it in with the paint. This would be a lot easier if you could print the letter and trace around it but at the time we did not have access to a printer, just the computer screen to copy from. We tried chalk first so the outline could easily be brushed off, it was a mess and was hard to see. I would suggest to go ahead and use a marker or pen, you will paint over it anyway.
You need the stencil brushes to get the paint in all the cracks, using the largest brush made it so easy and very quick to complete.
Once we had the circle done around the letter we let it dry a bit before adding a second coat just to make sure it is nice and black.
Adding the little 10.X.10 symbol was really easy to free hand using a smaller size brush. After it was completely dry I rolled it up and attached the card. It really didn't take that long to dry, maybe a half an hour but if you have more time give it longer before you roll it up.
They loved it and I'm really glad I was able to give a personalized gift that is also very functional.
I'll be back soon with more really great projects I completed last year as well as new ones from this year!
I have a couple BIG projects this year and I can't wait to tackle them this spring!!!


No comments:
Post a Comment
Thanks for the comment love! YOU ROCK!